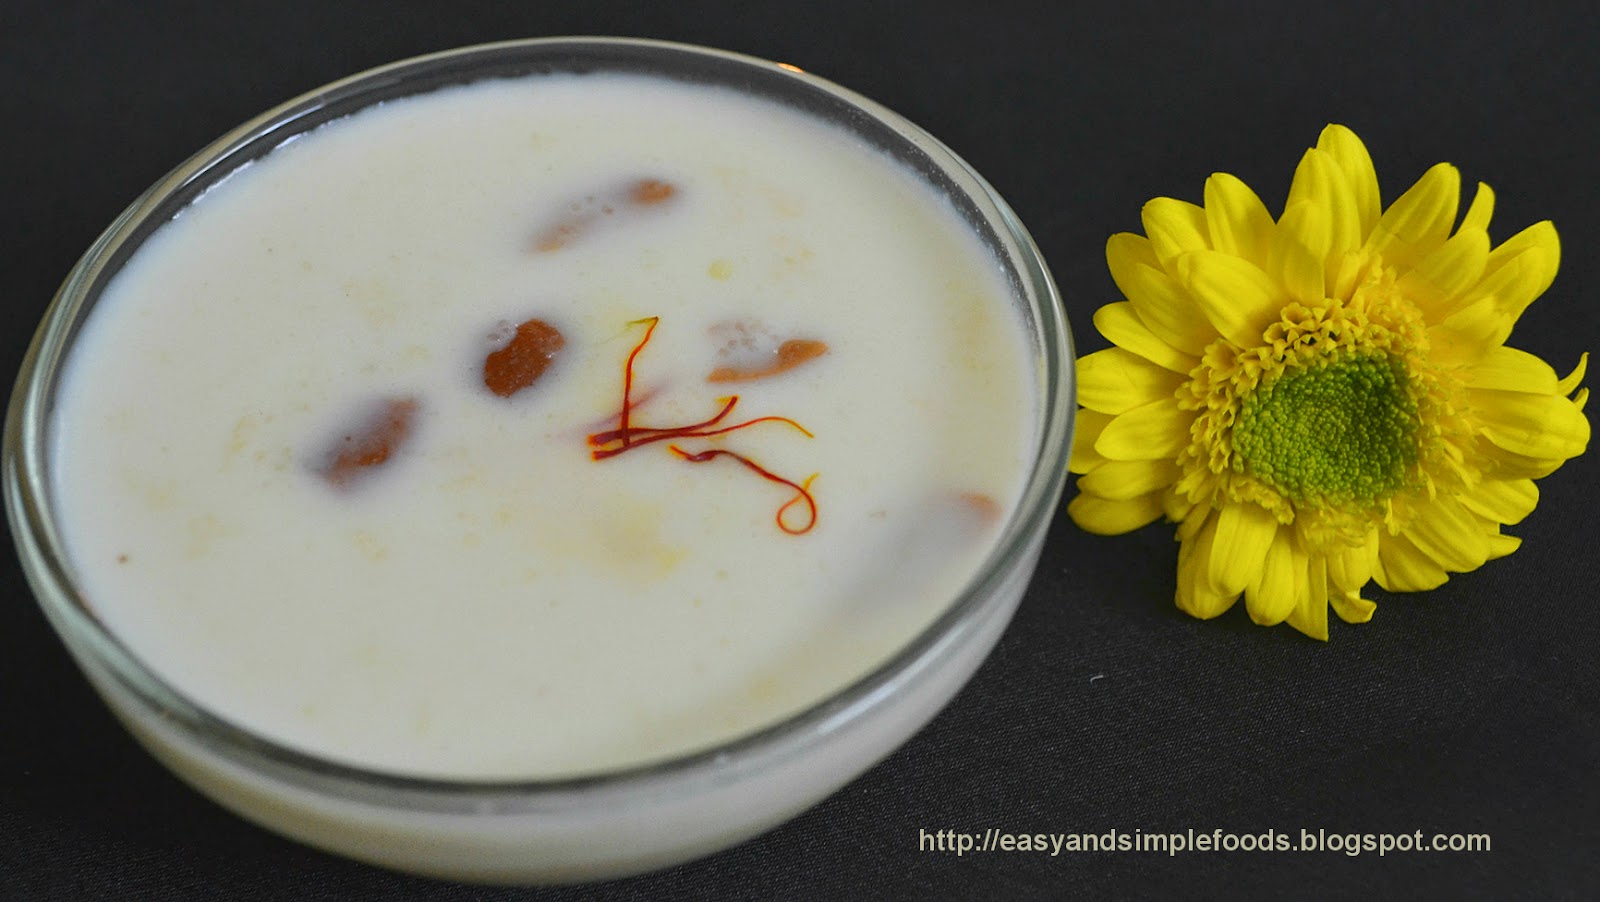
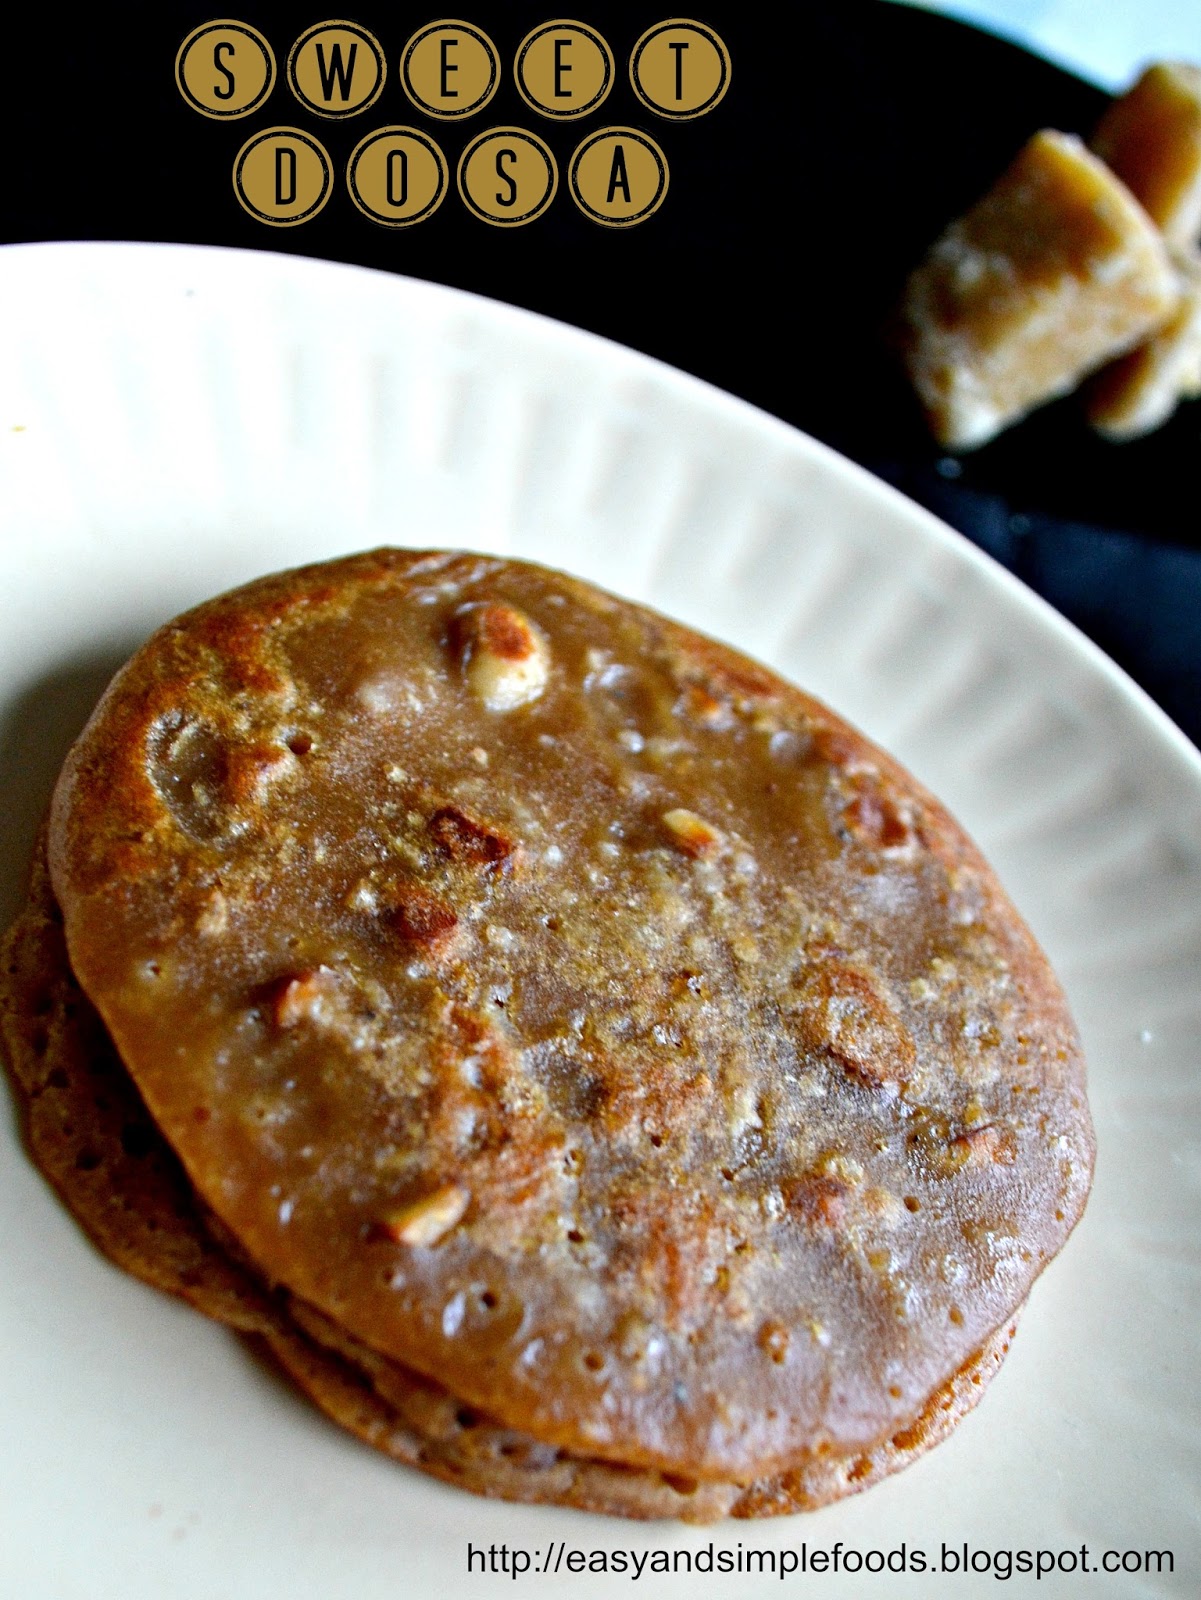
In my school days, sometimes mom prepares this dosai for evening snacks. This can be prepared quickly and easily with the ingredients available at home. Few days back I prepared this as after school snack for my daughter. she tasted it for first time and loved it.
It is rich in fiber and Iron as we add jaggery.
Lets see how to prepare it.
Ingredients:
Wheat flour - 1/2 cup
Jaggery powder - 1/3 cups
water - 1 cup
elachi powder - 1 pinch
Dry ginger powder / sukku powder - 1 pinch
cashew nuts - 1/2 tbsp ( chopped)
grated coconut -1 tbsp
ghee -2 tsp
Preparation:
1.Add Jaggery, sukku powder with water and bring to boil. (no need of string consistency)
2.Add elachi powder, flour and jaggery water and mix to a batter consistency
3. Now roast cashews, coconut in a tsp of ghee and add it to the batter.
4. Now heat the pan and make small and thick dosai (like oothappam thick)
5. Sprinkle little ghee on the edges and cook well on both the sides.
Serve Hot or warm.
Tips:
1.Always keep extra 1/2 cup of hot water ready. In case if the jaggery mixed water is boiled for little long time that wont be sufficient to have batter consistency.
2.Instead of grated coconut, tiny coconut pieces can be added.
3. The ratio given is medium sweet, adjust according to your taste.
Linking this post to Varada's event
Showing posts with label sweet. Show all posts
Monday, November 24, 2014
Saturday, November 8, 2014
Peanut Balls/ கடலை உருண்டை
GroundNut / Peanut - Ground nut / peanut balls- Another Back to school snack recipe.Which is healthy and easy to make in minutes. Peanuts are good source of protein, and rich in magnesium iron and calcium, which are playing essential part in our kids growth. We love to eat it in any form. weekly once I make Steamed Peanuts in season, and try to add in the recipes like upma, and variety rices. So some how, we consume these nuts more often.
Made these balls too for Ganesh Chathurthi this year. As we were starting to a long trip on the same night, I could not post the recipe. Even after coming back some how missed these to post. So here the recipe for you.
Ingredients:
Ground nut / peanuts(without skin) - 1 cup (roasted / non roasted)
Jaggery powder- 1/2 cup
elachi powder - a pinch
Preparation:
1. If you use the roasted ones, just roast it for a minute. Just to make sure it doesnt have any moist in it. and keep aside. If it is non roasted, roast it in simmer until the nuts are roasted well in all sides.
2. Let it cool down completely.
3. then add it to the mixer and make it to powder, when it is half done, add jaggery and elachi powder, and powder it.
4.Spread it in a plate and make balls out of it.
5.Store it in air tight container and serve
Notes:
1. Non- roasted means not the fresh ones in shell. It is the dry de-shelled peanuts.
2. I prefer roasted peanuts for this, as it gives a fine powder consistency.
3. I have used non roasted as the roasted ones were not in stock.
4. You can make it to a fine powder or leave some crunch to much as i did.
5.Jaggery quantity, 1/3 cups will be sufficient if you do not want it to be too sweet.. (Mine is sweet tooth as you know :)))
Linking this recipe to Beulah’s First Blog Anniversary Give away @ FullScoops
Made these balls too for Ganesh Chathurthi this year. As we were starting to a long trip on the same night, I could not post the recipe. Even after coming back some how missed these to post. So here the recipe for you.
Ingredients:
Ground nut / peanuts(without skin) - 1 cup (roasted / non roasted)
Jaggery powder- 1/2 cup
elachi powder - a pinch
Preparation:
1. If you use the roasted ones, just roast it for a minute. Just to make sure it doesnt have any moist in it. and keep aside. If it is non roasted, roast it in simmer until the nuts are roasted well in all sides.
2. Let it cool down completely.
3. then add it to the mixer and make it to powder, when it is half done, add jaggery and elachi powder, and powder it.
4.Spread it in a plate and make balls out of it.
5.Store it in air tight container and serve
Notes:
1. Non- roasted means not the fresh ones in shell. It is the dry de-shelled peanuts.
2. I prefer roasted peanuts for this, as it gives a fine powder consistency.
3. I have used non roasted as the roasted ones were not in stock.
4. You can make it to a fine powder or leave some crunch to much as i did.
5.Jaggery quantity, 1/3 cups will be sufficient if you do not want it to be too sweet.. (Mine is sweet tooth as you know :)))
Linking this recipe to Beulah’s First Blog Anniversary Give away @ FullScoops
Friday, October 31, 2014
Rava Kesari
Hello Folks,Today i am gonna share Rava Kesari Recipe. This is the basic rava kesari which we will be preparing for birthdays, festivals, and family gatherings. I have borrowed the recipe from my mom and trust me if you are a beginner and worried about lumps in kesari, this is the perfect recipe for you. It has never formed lumps, and all time success recipe.
Ingredients:
Rava - 1 cup
Sugar - 1 and 1/4 cup
ghee - 3-4 tbsp or as needed (melted ghee)
water - 2 cups
Cashews -1 tbsp
dry grapes - 1 tbsp
tutti frutti - 1 tbsp (optional)
saffron stands - a few
elachi powder - a generous pinch
kesari color -a pinch (optional)
Preparation:
1. Dry roast rava for few mins and keep aside in a plate.
2. Clean wipe the kadai and heat a a tbsp of ghee and roast, cashews, dry grapes, tutti frutti(if using) adding one by one.
3. In the mean time, measure 1 and 1/4 cup of sugar, elachi powder and mix in hands with the warm rava.
4. Measure 2 cups of water and add to the kadai, add saffron strand, kesari color .
5. Let the flame be on medium
6. when the water starts boiling (not rolling and boiling), simmer flame.
7. Now add the rava, sugar, elachi mix to the boiling water slowly.
8. (No panic, it will not form lumps) Then mix well with a long and flat spoon.
9. Add ghee little by little and stir well(preserve 1 tbsp of ghee), do not let it catch in the bottom.
10.When the rava is cooked, which means the water is completely absorbed, apply preserved ghee on top of the cooked kesari and let it rest for few mins.
Notes:
1. Using Tutti Frutti is not essential, I had few left over, so just used.
2. Sugar which I use is thin and fine, if your sugar is big crystals, you can use upto one and half cups of sugar.
3. I have sweet tooth, so i use this ratio, if you want less sweet, you can reduce. But do not go beyond 3/4cup.
4.Using more ghee is optional, if you have health issues, reduce the ghee.
5.It wont form lumps easily because, the rava and sugar is mixed and as sugar melts in boiling water, it gives some extra space when it is getting cooked. so it wont form lumps quickly.
6. Use melted ghee, which gives nice aroma, taste and takes less ghee in kesari
7. If you want to make slices, grease a plate / tray and spread the kesari evenly on it.Apply some ghee on top of it also. Let it cool down for a while, then make slices of needed shapes.
Absolutely delicious kesari will be ready to serve. It can be used in room temperature for one or two days. Refrigerated and used for up to a week. dont forget to check Pineapple kesari recipe too.
Wedding Anniversary Cakes and Sweets | HM Besties Event #02 ~ *- RecipesPassion -* with Haffa's kitchen Adventure
Ingredients:
Rava - 1 cup
Sugar - 1 and 1/4 cup
ghee - 3-4 tbsp or as needed (melted ghee)
water - 2 cups
Cashews -1 tbsp
dry grapes - 1 tbsp
tutti frutti - 1 tbsp (optional)
saffron stands - a few
elachi powder - a generous pinch
kesari color -a pinch (optional)
Preparation:
1. Dry roast rava for few mins and keep aside in a plate.
2. Clean wipe the kadai and heat a a tbsp of ghee and roast, cashews, dry grapes, tutti frutti(if using) adding one by one.
3. In the mean time, measure 1 and 1/4 cup of sugar, elachi powder and mix in hands with the warm rava.
4. Measure 2 cups of water and add to the kadai, add saffron strand, kesari color .
5. Let the flame be on medium
6. when the water starts boiling (not rolling and boiling), simmer flame.
7. Now add the rava, sugar, elachi mix to the boiling water slowly.
8. (No panic, it will not form lumps) Then mix well with a long and flat spoon.
9. Add ghee little by little and stir well(preserve 1 tbsp of ghee), do not let it catch in the bottom.
10.When the rava is cooked, which means the water is completely absorbed, apply preserved ghee on top of the cooked kesari and let it rest for few mins.
Notes:
1. Using Tutti Frutti is not essential, I had few left over, so just used.
2. Sugar which I use is thin and fine, if your sugar is big crystals, you can use upto one and half cups of sugar.
3. I have sweet tooth, so i use this ratio, if you want less sweet, you can reduce. But do not go beyond 3/4cup.
4.Using more ghee is optional, if you have health issues, reduce the ghee.
5.It wont form lumps easily because, the rava and sugar is mixed and as sugar melts in boiling water, it gives some extra space when it is getting cooked. so it wont form lumps quickly.
6. Use melted ghee, which gives nice aroma, taste and takes less ghee in kesari
7. If you want to make slices, grease a plate / tray and spread the kesari evenly on it.Apply some ghee on top of it also. Let it cool down for a while, then make slices of needed shapes.
Absolutely delicious kesari will be ready to serve. It can be used in room temperature for one or two days. Refrigerated and used for up to a week. dont forget to check Pineapple kesari recipe too.
Linking this recipe to
Beulah’s First Blog Anniversary Give away @ FullScoops
Sunday, August 10, 2014
Rava Ladoo
Happy Raksha Bandhan to all my brothers in the world :)
Though it is mostly celebrated in North India, Now it is getting popular in all around the nation. Raksha Bandhan is a festival for Brothers and Sisters to show their love and care. Sisters pray for Brother's well being and tie a Rakhi in brother's hand. And Brothers take a wow to protect their sisters. It doesn't mean to be celebrated only with the siblings. Any person who treats the people around as Brother / Sister and wish for their wellness can do this. This is my treat to all my brothers.
It is a simple dessert, yet liked by all for sure. During my college days, when i return back to hostel my mom used to pack this for sure along with the other snacks. Though shelf time is less for this ladoos(if milk is added), I never bothered as it gets finished in no time. My mom used to make few versions like, with / without milk, with / without scrapped coconut etc, depends on the occasion. Today I am sharing the recipe with milk. It can be used for 1-2 days in room temperature.
Ingredients:
Rava - 1 cup
Sugar - 3/4 cup
ghee - 1/4 cup + 2 tsp
Milk - 1/4 cup
Broken cashews - 2 tbsp
dry grapes - 1 tbsp
elachi - 1 tsp powdered.
Preparation:
1. In a Pan heat 2 tsp of ghee and fry cashews and dry grapes then keep them aside.
2. In the same pan, roast rava , Once rava is roasted well, (say in 5-7 mins in simmer flame), add sugar and mix well without lumps.
3. Then add 1/4 cup of milk and mix gently.
4. Add half of the milk taken and mix adding elachi powder to it.
5. Switch off the flame and let it become touchable/bearable hot.
6. Take a small portion of it and make it into balls.
7. If it is difficult to make it as ball sprinkle little more milk and try to make balls. Do not add more than the given quantity of milk.
Enjoy the delectable Ladoos with your family and friends :)
Though it is mostly celebrated in North India, Now it is getting popular in all around the nation. Raksha Bandhan is a festival for Brothers and Sisters to show their love and care. Sisters pray for Brother's well being and tie a Rakhi in brother's hand. And Brothers take a wow to protect their sisters. It doesn't mean to be celebrated only with the siblings. Any person who treats the people around as Brother / Sister and wish for their wellness can do this. This is my treat to all my brothers.
It is a simple dessert, yet liked by all for sure. During my college days, when i return back to hostel my mom used to pack this for sure along with the other snacks. Though shelf time is less for this ladoos(if milk is added), I never bothered as it gets finished in no time. My mom used to make few versions like, with / without milk, with / without scrapped coconut etc, depends on the occasion. Today I am sharing the recipe with milk. It can be used for 1-2 days in room temperature.
Ingredients:
Rava - 1 cup
Sugar - 3/4 cup
ghee - 1/4 cup + 2 tsp
Milk - 1/4 cup
Broken cashews - 2 tbsp
dry grapes - 1 tbsp
elachi - 1 tsp powdered.
Preparation:
1. In a Pan heat 2 tsp of ghee and fry cashews and dry grapes then keep them aside.
2. In the same pan, roast rava , Once rava is roasted well, (say in 5-7 mins in simmer flame), add sugar and mix well without lumps.
3. Then add 1/4 cup of milk and mix gently.
4. Add half of the milk taken and mix adding elachi powder to it.
5. Switch off the flame and let it become touchable/bearable hot.
6. Take a small portion of it and make it into balls.
7. If it is difficult to make it as ball sprinkle little more milk and try to make balls. Do not add more than the given quantity of milk.
Enjoy the delectable Ladoos with your family and friends :)
Saturday, July 5, 2014
Rava Payasam
An Easy to make payasam for guests and Poojas with less ingredients. It will be ready in minutes and will definitely treat your taste buds too.
I made this payasam this week for pooja. By the time I made pooja arrangements, the payasam was ready simultaneously.
Ingredients:
Rava - 2 table spoon
Milk - 2 cups
Water - 1 cup
sugar- 1/4 cup
Cashew nut / dry grape - 1 table spoon each
elachi powder - a pinch
saffron - few strands (optional)
Ghee - 2 tea spoons
Preparation:
1. Boil milk in a vessel
2. Boil a cup of water in another vessel
3.In the mean time, take a pan, heat ghee and roast cashew nuts and dry grapes separately and keep aside.
4. In the Same pan, roast, rava for 3 to 4 minutes in low flame.
5. By this time the water will be boiled, add the boiled water to the roasted rava and mix. Let the flame be in low.
6. When the rava is getting 75% cooked, add the boiling milk to it.
7. Let it boil together for another 2 or 3 minutes in low flame.
8. Add sugar, elachi powder, saffron and boil for 2-3 mins again.
9. Once the sugar dissolves well and the raw smell leaves add the roasted, cashew and dry grapes and switch off the flame.
Serve warm or cold.
Notes:
1. you can adjust the sugar quantity according to your taste buds. If you like a real sweetness in your payasam, I would suggest adding another table spoon of sugar.
2. do not skip roasting the rava, otherwise the payasam will get thickened fast. And will become soggy.
I made this payasam this week for pooja. By the time I made pooja arrangements, the payasam was ready simultaneously.
Ingredients:
Rava - 2 table spoon
Milk - 2 cups
Water - 1 cup
sugar- 1/4 cup
Cashew nut / dry grape - 1 table spoon each
elachi powder - a pinch
saffron - few strands (optional)
Ghee - 2 tea spoons
Preparation:
1. Boil milk in a vessel
2. Boil a cup of water in another vessel
3.In the mean time, take a pan, heat ghee and roast cashew nuts and dry grapes separately and keep aside.
4. In the Same pan, roast, rava for 3 to 4 minutes in low flame.
5. By this time the water will be boiled, add the boiled water to the roasted rava and mix. Let the flame be in low.
6. When the rava is getting 75% cooked, add the boiling milk to it.
7. Let it boil together for another 2 or 3 minutes in low flame.
8. Add sugar, elachi powder, saffron and boil for 2-3 mins again.
9. Once the sugar dissolves well and the raw smell leaves add the roasted, cashew and dry grapes and switch off the flame.
Serve warm or cold.
Notes:
1. you can adjust the sugar quantity according to your taste buds. If you like a real sweetness in your payasam, I would suggest adding another table spoon of sugar.
2. do not skip roasting the rava, otherwise the payasam will get thickened fast. And will become soggy.
Monday, May 12, 2014
Nan Khatai /சூஸ்பரி
Happy Mothers Day to all the mothers around the world :)))
Hope everyone had a great mothers day. I really had a great one this year... My daughter gifted me a flower vase which she made from school. And she herself drew, cut and colored a heart for me. And I got loads of kisses from her through out the day :))) She made a pretend cake and snacks, we both cut the cake and shared the snacks and played some pretend games. When it was my turn to be a baby and my daughter to be the mom, She asked me, "Sweetie!, what gift you are going to give me for Mother's day?" I was blinking what to answer, and she dint put me in trouble, she came up with a suggestion as "Mamma will be happy if you give a tight hug and a sweet kiss". So sweet mom (though pretend!) she was.
Now about the recipe, As mothers day special, I have prepared Nan Khatai / சூஸ்பரி which is my mom's favorite snack from her childhood. She never used to be particular about her favorite things. But these nan khatais are exceptional. The one we get in our native used to be very soft and used to melt in our mouth. And my mom loves these a lot.
So I have made these as Mothers day special recipe.
The Nan Khatai which i made this time were little crispy and the taste was awesome. It was liked by my family and friends also.
Recipe inspired from here
Ingredients:
All purpose flour - 1 cup
confectioner sugar - 1/2 cup
Butter - 1/2 cup (at room temperature)
baking powder - 1/2 tea spoon
salt - 1/8 tea spoon
nutmeg powder - 1/2 tea spoon
elachi powder - 1/2 tea spoon
Preparation:
1. In a mixing bowl beat butter well
2.Now add sugar and beat well to a smooth paste
3. Sieve flour, salt and baking powder
4.Add elachi powder, nutmeg powder then mix it to the smooth paste
5. Now add the flour mix little by little with the butter paste and mix well.
6. Once all the ingredients are mixed, knead the dough with hands, cover with a plastic wrapper or cover the bowl with a lid, and let it rest for 20 minutes.
7. After 20 minutes again knead the dough again and make small balls out of it.
8. In the mean time, pre-heat the oven to 300F and line the cookie sheet.
9. Then, arrange the balls with some gap between each and bake for 20-25 minutes in middle rack.
10.cool them in cooling rack and store it in airtight container.
Notes:
1.Given quantity of ingredients made about 12 medium sized cookies.
2. It took 23 minutes for me to bake in my oven.
3. If you are using salted butter, avoid adding salt in the cookies.
4. Just make the balls without crack so the cookies will be smooth and perfect in doom shape without any cracks in it.
5.Do not over bake, the cookies will turn hard and the bottom of the cookie will burn and the taste will get change.
6.When you remove from oven the cookies will look like soft, once they are cool down, it will be perfect crisp.
Hope everyone had a great mothers day. I really had a great one this year... My daughter gifted me a flower vase which she made from school. And she herself drew, cut and colored a heart for me. And I got loads of kisses from her through out the day :))) She made a pretend cake and snacks, we both cut the cake and shared the snacks and played some pretend games. When it was my turn to be a baby and my daughter to be the mom, She asked me, "Sweetie!, what gift you are going to give me for Mother's day?" I was blinking what to answer, and she dint put me in trouble, she came up with a suggestion as "Mamma will be happy if you give a tight hug and a sweet kiss". So sweet mom (though pretend!) she was.
Now about the recipe, As mothers day special, I have prepared Nan Khatai / சூஸ்பரி which is my mom's favorite snack from her childhood. She never used to be particular about her favorite things. But these nan khatais are exceptional. The one we get in our native used to be very soft and used to melt in our mouth. And my mom loves these a lot.
So I have made these as Mothers day special recipe.
The Nan Khatai which i made this time were little crispy and the taste was awesome. It was liked by my family and friends also.
Recipe inspired from here
Ingredients:
All purpose flour - 1 cup
confectioner sugar - 1/2 cup
Butter - 1/2 cup (at room temperature)
baking powder - 1/2 tea spoon
salt - 1/8 tea spoon
nutmeg powder - 1/2 tea spoon
elachi powder - 1/2 tea spoon
Preparation:
1. In a mixing bowl beat butter well
2.Now add sugar and beat well to a smooth paste
3. Sieve flour, salt and baking powder
4.Add elachi powder, nutmeg powder then mix it to the smooth paste
5. Now add the flour mix little by little with the butter paste and mix well.
6. Once all the ingredients are mixed, knead the dough with hands, cover with a plastic wrapper or cover the bowl with a lid, and let it rest for 20 minutes.
7. After 20 minutes again knead the dough again and make small balls out of it.
8. In the mean time, pre-heat the oven to 300F and line the cookie sheet.
9. Then, arrange the balls with some gap between each and bake for 20-25 minutes in middle rack.
10.cool them in cooling rack and store it in airtight container.
Notes:
1.Given quantity of ingredients made about 12 medium sized cookies.
2. It took 23 minutes for me to bake in my oven.
3. If you are using salted butter, avoid adding salt in the cookies.
4. Just make the balls without crack so the cookies will be smooth and perfect in doom shape without any cracks in it.
5.Do not over bake, the cookies will turn hard and the bottom of the cookie will burn and the taste will get change.
6.When you remove from oven the cookies will look like soft, once they are cool down, it will be perfect crisp.
sending this recipe to Rafee's baking fest event Bake fest May 2014
Thursday, April 17, 2014
Suraikkai payasam (Bottle gourd payasam)
Suraikkai / Bottle Gourd is one of the healthiest veggie.. We used to make kootu or curry some times make suraikkai adai also. I learned this recipe during my initial days of cooking after marriage. In recent days, I have made some changes than the original recipe, and liked my own way of preparation, and stuck to this method. I made this delicious payasam on Tamil new year. And it was a grand success this time too.
I am giving the measurements based on which I have made this time.
The general ratio is, 1:1:1/3
1(cup of finely chopped bottle gourd) : 1(1 cup milk):1/3 (1/3 cup of sugar)
Ingredients:
Finely chopped bottle gourd- 1 and 1/2 cup
Milk - 1 and 1/2 cup
sugar - 1/2 cup
Ghee - 2 tea spoon
coconut- few small pieces (say 2 table spoons coconut pieces)
cashews - 10 + 8
elachi powder - a pinch
Preparation:
1. Boil milk and keep aside.
2. In a sauce pan, heat 2 tea spoons of ghee and fry the cashews, and keep aside.
3. in the same pan, saute the chopped bottle gourd until its raw smell leaves.
4. then add about 3 cups of water (2 times your quantity of veggie) and let it cook in low flame.
(If you need a mashed consistency of bottle gourd in payasam add an extra cup of water. I liked to have the bites of bottle gourd pieces, so just cooked until soft)
5. Let it cook well until they turn soft, and let all the water evaporated.
6. In the mean time, in a blender, add 8 cashews,coconut and a table spoon of boiled milk (use from 1 and 1/2 cup mentioned above) or the required amount of milk, and grind it to a fine paste, and keep aside.
7. now add the remaining milk to the cooked veggie and let it cook for few minutes,
8.Once they are blended add sugar and give a stir.
9.then add the ground paste, and elachi powder, let the mix cook for a minute and switch off the flame.
10. add/Garnish with the fried cashews, serve warm or chilled.
Notes:
1. you may even pressure cook the veggie, if you want to make it quickly.
2. If you Pressure cook, adjust the water level accordingly.
3.All the water should be evaporated, before adding milk.
4. if you want to mash the bottle gourd completely, you can either pressure cook or give a quick pulse in blender once it is cooked softly.
This month, I have got the veggie to cook in SYS-W series is bottle gourd. Hence linking this recipe to Viji's SYS-W event
Sending this recipe to fruit and Veggie based sweet treats hosted by Chef Mireille and organized by Swati
I am giving the measurements based on which I have made this time.
The general ratio is, 1:1:1/3
1(cup of finely chopped bottle gourd) : 1(1 cup milk):1/3 (1/3 cup of sugar)
Ingredients:
Finely chopped bottle gourd- 1 and 1/2 cup
Milk - 1 and 1/2 cup
sugar - 1/2 cup
Ghee - 2 tea spoon
coconut- few small pieces (say 2 table spoons coconut pieces)
cashews - 10 + 8
elachi powder - a pinch
Preparation:
1. Boil milk and keep aside.
2. In a sauce pan, heat 2 tea spoons of ghee and fry the cashews, and keep aside.
3. in the same pan, saute the chopped bottle gourd until its raw smell leaves.
4. then add about 3 cups of water (2 times your quantity of veggie) and let it cook in low flame.
(If you need a mashed consistency of bottle gourd in payasam add an extra cup of water. I liked to have the bites of bottle gourd pieces, so just cooked until soft)
5. Let it cook well until they turn soft, and let all the water evaporated.
6. In the mean time, in a blender, add 8 cashews,coconut and a table spoon of boiled milk (use from 1 and 1/2 cup mentioned above) or the required amount of milk, and grind it to a fine paste, and keep aside.
7. now add the remaining milk to the cooked veggie and let it cook for few minutes,
8.Once they are blended add sugar and give a stir.
9.then add the ground paste, and elachi powder, let the mix cook for a minute and switch off the flame.
10. add/Garnish with the fried cashews, serve warm or chilled.
Notes:
1. you may even pressure cook the veggie, if you want to make it quickly.
2. If you Pressure cook, adjust the water level accordingly.
3.All the water should be evaporated, before adding milk.
4. if you want to mash the bottle gourd completely, you can either pressure cook or give a quick pulse in blender once it is cooked softly.
This month, I have got the veggie to cook in SYS-W series is bottle gourd. Hence linking this recipe to Viji's SYS-W event
Sending this recipe to fruit and Veggie based sweet treats hosted by Chef Mireille and organized by Swati
Saturday, April 12, 2014
Pineapple Kesari
Kesari would be everyone's all time favorite. I have seen many people preparing this delicious sweet for almost all the occasions, like birthdays, wedding days and parties, and for guests.I too made this last week during my hubby's birthday. Just by adding a scoop of kesari to your breakfast or dinner plate that becomes special for sure...
My mom used to make kesari so good. You can't stop it with one bowl and definitely will ask for more. Wherever I eat kesari, I never got satisfied with it's taste or texture, and always used to ask my mom to make for me. But I never tried to make kesari by my own until last year. initially I used to call her every time I make kesari for the measurements. Now got used to it.
But now I became fan of another person's Kesari recipe recently. Yes it is my friend's recipe, and I am going to share her recipe today. Once when we visited her, she just prepared it in minutes and treated us, and sent with us a box of kesari to home. I really enjoyed every bite of it. I just noticed the way she prepared and tried at home. Though it is little different than the one which mom taught me, it was easy to follow and it was a great success all the times I made so far:)
Ingredients:
Rava (Coarse): 1 cup
sugar - 1 and 1/2 cups
Boiling water - 2 cups
Pineapple - 1/2 cup (chopped)
Ghee- 2 table spoons
elachi powder - a pinch 9optional)
Yellow food color - a pinch
Cashews and dry grapes - a few
Preparation
1. In a Pan heat a table spoon of ghee, and fry the cashews and dry grapes
2. Then add the chopped pineapples and saute until they are fried and tender.
3. Add Rava and roast until it roasts well in low flame. (say about 8-10 minutes)
4. In the mean time bring water to boil.
5. Just before adding water to rava, add a pinch of food color in water and mix well.
6. Then Add boiling water to rava and mix well without lumps.
7. It will get cooked and become thick in minutes.
8.Then add sugar and mix well. At this stage, again the kesari becomes watery/ semi fluid.
9. Keep stir until you reach the required consistency.
10.Add the remaining a table spoon of ghee, elachi powder, mix and switch off the flame.
I served with Pongal, coconut chutney, Sambar and urad dal vadai
Just a small scoop of this kesari made the diiner special.
Notes:
1. if yo want crispy cashews to bite, you can even keep aside the fried cashews and dry grapes and add them in the final stage.
2. normally 1 and 1/2 cup of water would be sufficient, if you need the kesari consistency not to be dry and blended nicely add 2 cups.
3.adding elachi powder is optional... I didn't add.
Sending this recipe to fruit and Veggie based sweet treats hosted by Chef Mireille and organized by Swati
My mom used to make kesari so good. You can't stop it with one bowl and definitely will ask for more. Wherever I eat kesari, I never got satisfied with it's taste or texture, and always used to ask my mom to make for me. But I never tried to make kesari by my own until last year. initially I used to call her every time I make kesari for the measurements. Now got used to it.
But now I became fan of another person's Kesari recipe recently. Yes it is my friend's recipe, and I am going to share her recipe today. Once when we visited her, she just prepared it in minutes and treated us, and sent with us a box of kesari to home. I really enjoyed every bite of it. I just noticed the way she prepared and tried at home. Though it is little different than the one which mom taught me, it was easy to follow and it was a great success all the times I made so far:)
Ingredients:
Rava (Coarse): 1 cup
sugar - 1 and 1/2 cups
Boiling water - 2 cups
Pineapple - 1/2 cup (chopped)
Ghee- 2 table spoons
elachi powder - a pinch 9optional)
Yellow food color - a pinch
Cashews and dry grapes - a few
Preparation
1. In a Pan heat a table spoon of ghee, and fry the cashews and dry grapes
2. Then add the chopped pineapples and saute until they are fried and tender.
3. Add Rava and roast until it roasts well in low flame. (say about 8-10 minutes)
4. In the mean time bring water to boil.
5. Just before adding water to rava, add a pinch of food color in water and mix well.
6. Then Add boiling water to rava and mix well without lumps.
7. It will get cooked and become thick in minutes.
8.Then add sugar and mix well. At this stage, again the kesari becomes watery/ semi fluid.
9. Keep stir until you reach the required consistency.
10.Add the remaining a table spoon of ghee, elachi powder, mix and switch off the flame.
I served with Pongal, coconut chutney, Sambar and urad dal vadai
Just a small scoop of this kesari made the diiner special.
Notes:
1. if yo want crispy cashews to bite, you can even keep aside the fried cashews and dry grapes and add them in the final stage.
2. normally 1 and 1/2 cup of water would be sufficient, if you need the kesari consistency not to be dry and blended nicely add 2 cups.
3.adding elachi powder is optional... I didn't add.
Sending this recipe to fruit and Veggie based sweet treats hosted by Chef Mireille and organized by Swati
Wednesday, April 2, 2014
Palkova- Guest post#2 for Remya
Today it is a guest post for one of my sweet friend Remya Sean.
To tell about Remya, she is a very simple and down to earth person. The one who suggests and share the tips.. When I was new to blogging (still new but in the very beginning days) she was one among the persons who guided / helped me to improve my blogging. Even now, If I need something she will be there to give a helping hand. Very glad to have her in my life.
About her blog and recipes, you can find traditional Kerala recipes as well as innovative new recipes in her blog. Right from simple chutneys, to refreshing drinks and desserts she got a good collection of recipes. You must visit her space and explore it.
When She asked me to do a guest post, I was so excited and asked her what she likes... She gave me a broad choice of any tamil nadu recipe... So decided to make a traditional Tamil Nadu special sweet recipe, and thought it will most suit for this sweet girl. And surprisingly this girl loves Palkova.. What a coincidence right?
Palkova is my mom's one of the signature recipe. She used to make it so perfect... Two important things other than the ingredients are required for making palkova.. First a heavy bottomed vessel and then Patience. :) As it takes little more time than an hour, we need to stand and stir. but to enjoy a rich and healthy(! I believe it is healthy as it is made from milk) sweet, wont we stand?
Please visit Remya's blog for the detailed recipe and more clicks :)
Monday, March 17, 2014
Milk Peda
Here is another recipe for Holi...
Making of milk Peda was so simple and you can consider this sweet for festivals, Parties and potluck.
My mom used to make Palkova at home, with fresh milk, That is the only milk sweet we prepare at home...but I never thought of using milk powder and making a simple dessert... :) I thought of making palkova as i had a gallon of milk in fridge unused.... But after checking this recipe from Archana's Kitchen, I was attracted by its simplicity. So I wanted to try and as it is a successful recipe, I am archiving it for future reference
Here is the recipe:
I have adjusted the sugar level according to my preference.. For the actual measurement of ingredients please check here
Ingredients:
Milk powder - 1-3/4 cups
Condensed milk - 1 cup (397 ml tin will be 1-1/2 cups,)
butter -3 table spoon (at room temperature)
elachi powder - 1/2 tea spoon
ghee -1 tea spoon (to grease palm)
Food color - one pinch diluted in a tea spoon of water (optional)
Boiled milk at room temperature - 1 or 2 tea spoon (if required)
almonds / pistachios- chopped - for decoration
Preparation:
1. Add, butter, milk powder, condensed milk, and whisk them well.
2. Put them in a low heat and mix well for two to three minutes.
3. When the dough is formed, oil spots will be shown in the pan.Then add elachi powder and mix well again. (If it looks in a dry or Puttu kind of texture, no problem, we are going to kneed it again)
4. Once the dough becomes cool, kneed them well. If it is dry add a tea spoon of boiled milk and kneed well.
5. If you need the colored beda, mix the diluted colors a drop with the dough.
6. grease your palms with ghee and take a small amount of dough and make it a ball.
7.Press the center of ball with your finger and decorate it with chopped almonds or pistachios.
Repeat the steps for the remaining dough.
Adding colors are purely optional. try to add very minimal.. :)
Hope you enjoyed the recipe. Share it to your friends too :) Thanks... Tomorrow coming up with a colorful lunch box recipe.. :)
Group of we friends are celebrating holi with colorful recipes. wish you all a colorful and happy holi wishes again :)
Sharing this recipe to,
FR event hosted by Tanushree and Organized by Swathi
![]() |
| Milk Beda |
Making of milk Peda was so simple and you can consider this sweet for festivals, Parties and potluck.
My mom used to make Palkova at home, with fresh milk, That is the only milk sweet we prepare at home...but I never thought of using milk powder and making a simple dessert... :) I thought of making palkova as i had a gallon of milk in fridge unused.... But after checking this recipe from Archana's Kitchen, I was attracted by its simplicity. So I wanted to try and as it is a successful recipe, I am archiving it for future reference
Here is the recipe:
I have adjusted the sugar level according to my preference.. For the actual measurement of ingredients please check here
Ingredients:
Milk powder - 1-3/4 cups
Condensed milk - 1 cup (397 ml tin will be 1-1/2 cups,)
butter -3 table spoon (at room temperature)
elachi powder - 1/2 tea spoon
ghee -1 tea spoon (to grease palm)
Food color - one pinch diluted in a tea spoon of water (optional)
Boiled milk at room temperature - 1 or 2 tea spoon (if required)
almonds / pistachios- chopped - for decoration
Preparation:
1. Add, butter, milk powder, condensed milk, and whisk them well.
2. Put them in a low heat and mix well for two to three minutes.
3. When the dough is formed, oil spots will be shown in the pan.Then add elachi powder and mix well again. (If it looks in a dry or Puttu kind of texture, no problem, we are going to kneed it again)
4. Once the dough becomes cool, kneed them well. If it is dry add a tea spoon of boiled milk and kneed well.
5. If you need the colored beda, mix the diluted colors a drop with the dough.
6. grease your palms with ghee and take a small amount of dough and make it a ball.
7.Press the center of ball with your finger and decorate it with chopped almonds or pistachios.
Repeat the steps for the remaining dough.
Adding colors are purely optional. try to add very minimal.. :)
Hope you enjoyed the recipe. Share it to your friends too :) Thanks... Tomorrow coming up with a colorful lunch box recipe.. :)
Group of we friends are celebrating holi with colorful recipes. wish you all a colorful and happy holi wishes again :)
Sharing this recipe to,
FR event hosted by Tanushree and Organized by Swathi
Subscribe to:
Posts (Atom)


.jpg)